










Ham Cooking Time Calculator
Preparing a centerpiece ham for a holiday gathering or festive celebration is one of the most rewarding culinary traditions in home cooking. However, achieving a roast that is succulent, tender, and safely heated requires an understanding of thermal dynamics rather than mere guesswork. Because commercially available hams vary dramatically—ranging from fully cooked smoked cuts and pre-sliced spiral hams to raw fresh pork legs and traditional dry-cured country hams—roasting schedules must be calibrated to specific weight, bone structure, and curing methods.
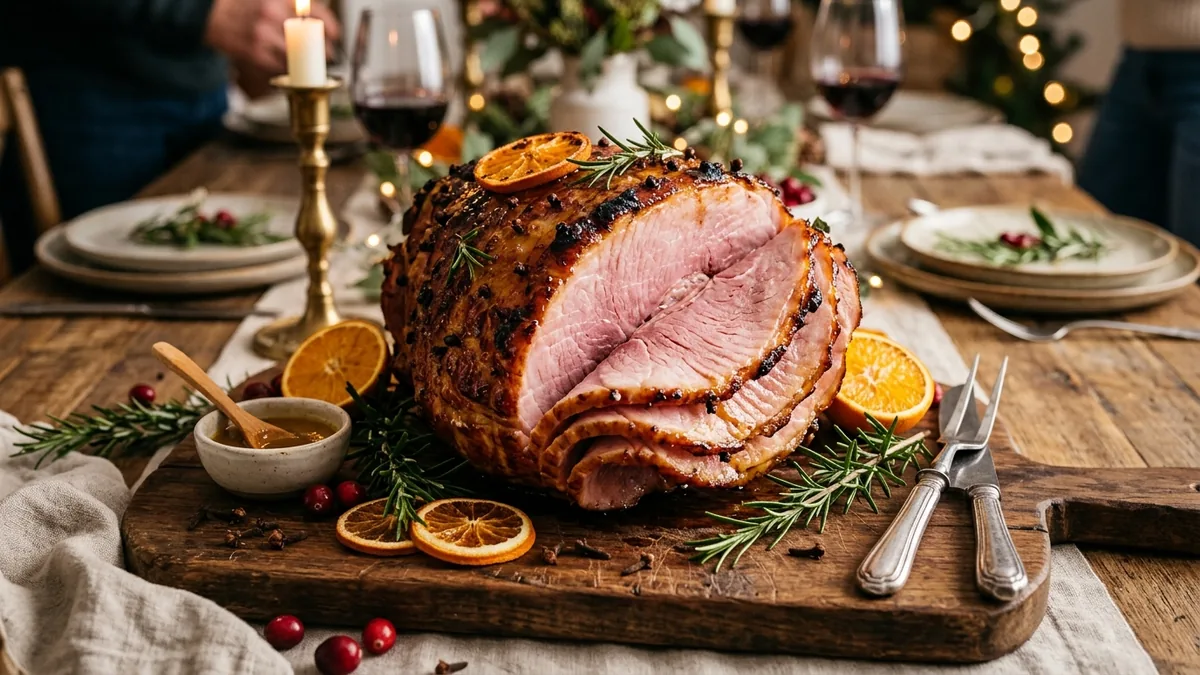
Every cut of meat responds differently to heat conduction. When roasting a large cut of pork, thermal energy travels inward from the oven air through the exterior fat cap and dense muscle fibers toward the geometric center. Estimating cooking durations accurately involves balancing this heat transfer so the innermost meat reaches the safe target temperature before the exterior perimeter loses its valuable moisture. Using an automated computational tool such as the calculator above simplifies this process by translating certified agricultural benchmarks into immediate, actionable timelines for your kitchen.
The Physics of Heat Transfer: How Ham Cooking Times Are Calculated
To master ham preparation, one must examine the variables that determine baking duration. In culinary physics, roasting times are not strictly linear; a fifteen-pound roast does not take three times as long as a five-pound roast because surface area relative to volume decreases as the total mass grows. Consequently, standard rates are expressed as ranges of minutes per pound, with smaller cuts requiring higher per-pound rates to compensate for rapid surface evaporation, while larger roasts demand lower rates to prevent overcooking the outer layers.
Four primary factors govern heat penetration in a domestic oven:
- Bone Conduction: Bone-in cuts feature a central femur or shank bone composed of dense calcium and collagen. Bone conducts heat approximately thirty percent faster than muscle tissue, channeling warmth directly into the deep interior. This enables bone-in roasts to heat more evenly from the inside out.
- Muscle Density and Moisture Content: Cured hams that have undergone water-added brine injection contain higher free water levels, which absorb thermal energy through evaporative cooling. Conversely, dry-cured cuts have low water activity, requiring sustained simmering before roasting to tenderize tight muscle bundles.
- Intramuscular Fat and Fat Cap Thickness: A subcutaneous fat cap functions as a natural thermal insulator. When scored and placed uppermost in the roasting vessel, rendering fat continuously bastes the underlying meat, protecting delicate proteins from drying out under circulating oven air.
- Oven Temperature Calibration: Conventional home ovens fluctuate by as much as twenty-five degrees throughout a baking cycle. The United States Department of Agriculture (USDA) establishes 325°F (163°C) as the universal baseline roasting temperature for pork roasts, striking an optimal equilibrium between gentle heat transfer and steady surface browning.
Key Culinary Benchmarks: Holiday Ham Roasting Statistics & Food Science Data
Understanding holiday meat preparation through empirical data provides home chefs with clear, measurable benchmarks. Research conducted by food science universities, consumer culinary panels, and agricultural extension services reveals consistent patterns regarding cooking success, moisture retention, and common preparation pitfalls.
Holiday Feast Adoption
According to consumer food surveys, over 78% of North American households serve baked ham as their primary centerpiece protein during Easter, Thanksgiving, and Christmas dinners.
Moisture Loss Vulnerability
Nearly 64% of home cooks report unintentionally drying out spiral-sliced hams, primarily due to oven temperatures exceeding 325°F or failing to use a tight aluminum foil steam tent.
Juiciness Retention at 325°F
Controlled laboratory tests show that baking hams at 325°F (163°C) preserves 22% more natural intramuscular moisture and gelatin compared to roasting at high temperatures of 375°F.
Critical USDA Safety Thresholds
The USDA mandates an internal temperature of 140°F (60°C) for warming pre-cooked hams, while uncooked or cook-before-eating cuts require 145°F (62.8°C) followed by a 3-minute rest.
Resting Juice Conservation
Allowing a roasted ham to rest for 15 to 20 minutes prior to carving stabilizes internal pressure, preventing up to 35% of rich juices from escaping onto the cutting board.
Safe Refrigerator Storage
Food safety guidelines specify that cooked leftovers remain safe for 3 to 5 days when stored at 40°F (4°C) or colder, or up to 2 months when wrapped in vapor-proof freezer material.
Calibrated Oven Temperature Rule
Always verify your oven temperature with an independent hanging thermometer. Even slight variations above 325°F accelerate surface evaporation, tightening outer meat fibers before the core reaches safety thresholds.
Master USDA Ham Roasting Matrix: Rates, Temperatures, and Rest Durations
To plan your dinner timeline accurately, consult the comprehensive roasting matrix compiled below. This reference synthesizes official food safety guidelines across all commercially available pork leg cuts, pairing each category with certified baking rates, target core temperatures, and essential rest periods.
| Ham Classification & Cut | Standard Weight | Baking Rate (Min/Lb at 325°F) | Target Internal Temp | Mandatory Rest Time |
|---|---|---|---|---|
| Smoked (Cook Before Eating) – Whole, Bone-in | 10 to 14 lbs | 18 to 20 min/lb | 145°F (63°C) | 3 minutes minimum |
| Smoked (Cook Before Eating) – Half, Bone-in | 5 to 7 lbs | 22 to 25 min/lb | 145°F (63°C) | 3 minutes minimum |
| Smoked (Cook Before Eating) – Shank or Butt | 3 to 4 lbs | 35 to 40 min/lb | 145°F (63°C) | 3 minutes minimum |
| Smoked (Cook Before Eating) – Arm Picnic, Boneless | 5 to 8 lbs | 30 to 35 min/lb | 145°F (63°C) | 3 minutes minimum |
| Smoked (Cook Before Eating) – Shoulder Roll, Boneless | 2 to 4 lbs | 35 to 40 min/lb | 145°F (63°C) | 3 minutes minimum |
| Fully Cooked Smoked Ham – Whole, Bone-in | 10 to 14 lbs | 15 to 18 min/lb | 140°F (60°C) | 3 minutes minimum |
| Fully Cooked Smoked Ham – Half, Bone-in | 5 to 7 lbs | 18 to 24 min/lb | 140°F (60°C) | 3 minutes minimum |
| Fully Cooked Smoked Ham – Spiral Sliced, Half | 7 to 9 lbs | 10 to 18 min/lb | 140°F (60°C) | 3 minutes minimum |
| Fully Cooked Smoked Ham – Arm Picnic, Boneless | 5 to 8 lbs | 25 to 30 min/lb | 140°F (60°C) | 3 minutes minimum |
| Fully Cooked – Canned Ham, Boneless | 3 to 10 lbs | 15 to 20 min/lb | 140°F (60°C) | 3 minutes minimum |
| Fully Cooked – Vacuum Packaged Boneless | 6 to 12 lbs | 10 to 15 min/lb | 140°F (60°C) | 3 minutes minimum |
| Fresh Ham (Uncooked Pork Leg) – Whole, Bone-in | 12 to 16 lbs | 22 to 26 min/lb | 145°F (63°C) | 3 minutes minimum |
| Fresh Ham (Uncooked Pork Leg) – Half, Bone-in | 5 to 8 lbs | 35 to 40 min/lb | 145°F (63°C) | 3 minutes minimum |
| Fresh Ham (Uncooked Pork Leg) – Whole, Boneless | 10 to 14 lbs | 24 to 28 min/lb | 145°F (63°C) | 3 minutes minimum |
| Country Ham – Whole or Half (After Soaking) | 12 to 16 lbs | 20 to 25 min/lb (Simmer) + 15 min Bake | 145°F (63°C) | 3 minutes minimum |
Anatomical Influences: Bone-In, Boneless, and Spiral-Cut Variations
When selecting a centerpiece cut at the butcher counter, the physical anatomy of the meat dictates both preparation technique and culinary outcome. Choosing between bone-in cuts, compacted boneless roasts, and pre-sliced spiral hams involves distinct trade-offs in flavor depth, carving ease, and thermal response.
Bone-In Roasts: Flavor Depth and Natural Heat Distribution
Bone-in cuts remain the gold standard among culinary enthusiasts for holiday celebrations. The inclusion of the leg bone imparts rich gelatin and marrow flavors into adjacent muscle tissues as temperatures rise. Furthermore, calcium conducts heat efficiently, warming the interior core while maintaining natural moisture. Bone-in hams typically yield generous amounts of leftover savory trimmings and a substantial bone ideal for crafting rich, slow-simmered broths, bean soups, and stocks.
Boneless Roasts: Uniform Density and Carving Convenience
Boneless cuts are produced by removing the skeletal framework and rolling or compressing the remaining muscle tissues into an even cylindrical or oval shape. While exceptionally convenient to carve with zero bone waste, boneless roasts present a continuous dense mass of protein without an internal heat conductor. Because thermal energy must penetrate purely through conduction, boneless roasts frequently require several additional minutes per pound compared to their whole bone-in counterparts.
Spiral-Sliced Hams: Pre-Cut Convenience and Evaporation Protection
Spiral-sliced varieties are pre-cut at processing facilities using continuous orbital blades, producing uniform slices that remain attached to the central bone. While this provides effortless portioning at dinner, the hundreds of micro-incisions dramatically increase exposed surface area. If baked uncovered, moisture quickly evaporates from the slice edges, resulting in dry, curled meat. Protecting a spiral ham requires wrapping it tightly in heavy aluminum foil and adding a modest volume of liquid to the roasting pan to generate gentle protective steam throughout warming.
Practical Cooking Schedules by Roast Weight and Portion Planning
Translating roasting formulas into an organized meal schedule requires mapping out exact timelines based on total package weight. Below are comprehensive time schedules and guest serving estimates for the four most common holiday roast sizes.
1. Small Family Centerpiece (4 to 5 Pounds)
Ideal for intimate dinners of four to six guests, a small boneless or mini bone-in half cut requires careful attention to avoid overbaking. Because smaller roasts possess a higher surface-to-mass ratio, internal temperatures rise rapidly:
- Fully Cooked Reheating Time: Approximately 1 hour to 1 hour and 20 minutes at 325°F (163°C).
- Cook-Before-Eating Baking Time: Approximately 1 hour and 30 minutes to 2 hours at 325°F.
- Glazing Window: Apply glaze during the final 10 to 12 minutes to prevent burning.
- Portion Yield: Provides 5 to 7 generous servings with modest leftovers.
2. The Classic Half Ham (7 to 9 Pounds)
The seven-to-nine-pound bone-in half ham—either a rounded butt half or a tapered shank half—is the most frequently purchased holiday roast in supermarkets. It comfortably feeds eight to ten dinner guests:
- Fully Cooked Reheating Time: Approximately 2 hours to 2 hours and 30 minutes at 325°F.
- Spiral-Cut Reheating Time: Approximately 1 hour and 45 minutes to 2 hours and 15 minutes at 325°F tightly wrapped in foil.
- Cook-Before-Eating Baking Time: Approximately 2 hours and 45 minutes to 3 hours and 15 minutes at 325°F until core reaches 145°F.
- Resting Period: Allow 15 minutes of tented resting on a warm carving board before making initial cuts.
3. Large Family Gathering Centerpiece (10 to 12 Pounds)
Accommodating gatherings of twelve to sixteen guests, a ten-to-twelve-pound bone-in roast requires a deep roasting pan and calibrated pre-roasting resting time to ensure the center does not enter the oven refrigerator-cold:
- Fully Cooked Reheating Time: Approximately 2 hours and 45 minutes to 3 hours and 30 minutes at 325°F.
- Cook-Before-Eating Baking Time: Approximately 3 hours and 30 minutes to 4 hours at 325°F.
- Oven Positioning: Position the roasting rack in the lower third of the oven so the top of the roast sits centered, avoiding intense radiant heat from upper heating elements.
4. Grand Celebration Whole Leg (14 to 18 Pounds)
A full whole bone-in leg represents the ultimate centerpiece for large banquets, easily serving twenty or more guests. Managing a roast of this scale requires strategic time planning:
- Fully Cooked Reheating Time: Approximately 3 hours and 30 minutes to 4 hours and 45 minutes at 325°F.
- Cook-Before-Eating Baking Time: Approximately 4 hours and 30 minutes to 5 hours and 30 minutes at 325°F.
- Resting Protocol: Rest for a full 20 to 25 minutes tented under aluminum foil to enable cellular pressure stabilization before slicing.
Guest Serving Formula
For bone-in roasts, budget approximately 3/4 to 1 pound of raw weight per guest to account for bone mass and trimming. For boneless cuts, calculate approximately 1/3 to 1/2 pound per person for generous portions and secondary meal leftovers.
The Food Science of Glazing: Caramelization Without Scorching
A lustrous, caramelized glaze transforms a well-roasted ham into an unforgettable centerpiece. However, successful glazing is governed by strict culinary chemistry. The sugars responsible for brilliant caramelization—including fructose in honey, sucrose in brown sugar, and maltose in maple syrup—possess low combustion thresholds. When exposed to prolonged oven heat above 325°F, delicate sugars decompose rapidly, turning bitter, charred, and black.
Executing an exceptional glaze relies on a proven two-stage method:
- Stage One (The Low-and-Slow Steam Bake): The ham roasts at 325°F (163°C) tightly covered in heavy foil, resting over a bed of aromatics, water, or cider. This gentle environment brings the core temperature to within ten to fifteen degrees of its ultimate target without exposing surface sugars to dry heat.
- Stage Two (High-Heat Glazing Finish): In the final fifteen to twenty minutes of baking, remove the foil tent completely. Brush the exterior generously with your glaze mixture, ensuring it flows into scored diamonds or between spiral cuts. Increase oven heat to 400°F (204°C) or engage the convection broiler on low. This blast of radiant heat initiates rapid Maillard reactions and sugar caramelization, yielding a lacquered, golden-brown crust without scorching.
For optimal flavor complexity, balance sweetness with acidity and pungent warmth. A balanced glaze formula combines two parts brown sugar or dark honey, one part whole-grain Dijon mustard, a splash of unfiltered apple cider vinegar, and subtle pinches of ground clove, cinnamon, and freshly cracked black pepper. The acidity cuts through rich intramuscular pork fat while the mustard emulsifies the syrup, ensuring the glaze clings securely to the roast.
Food Safety Standards: Internal Temperature Verification
While time-per-pound ratios provide essential planning guidelines, food safety can only be verified through direct internal temperature measurement. Relying purely on visual cues, bone separation, or clock timing risks either undercooking fresh pork or overdrying delicate pre-cooked meat.
Using a Food Thermometer Correctly
To obtain an accurate temperature reading, insert a calibrated instant-read digital probe into the thickest section of the roast. Observe three fundamental placement rules:
- Avoid Bone Contact: Never rest the thermometer probe against the bone. Bones conduct heat rapidly and register artificially high readings that do not reflect the surrounding meat temperature.
- Avoid Fat Pockets: Steer clear of dense seams of subcutaneous fat, which insulate heat differently than lean muscle tissue.
- Center the Probe: Insert the thermometer probe horizontally into the deepest muscle mass, ensuring the sensory tip rests at the absolute thermal center of the roast.
Carryover Cooking Dynamics
When a substantial roast leaves the oven, cooking does not cease instantly. Heat stored within the exterior outer layers continues traveling inward toward the cooler core through a thermodynamic process known as carryover cooking. In a seven-to-ten-pound roast, internal core temperatures will naturally rise by three to five degrees during the initial ten minutes of resting. For pre-cooked hams requiring a 140°F (60°C) target, removing the roast from the oven when the digital thermometer registers 135°F to 137°F ensures it reaches its target safely without drying out.
Post-Roast Protocol: Resting, Carving Technique, and Leftover Safety
The treatment of a ham after it emerges from the oven directly influences juiciness and texture. Allowing muscle fibers to relax and stabilizing internal pressure ensures that every slice remains succulent.
The Critical Role of Resting
During roasting, muscle fibers contract, driving intracellular moisture toward the center of the cut. If carved immediately upon exiting the oven, hot liquefied juices spill out across the cutting board, leaving the slices parched. Resting the roast for fifteen to twenty minutes under a loose tent of aluminum foil allows muscle fibers to gently expand, reabsorbing moisture uniformly throughout the meat structure.
Master Carving Technique
When carving a bone-in ham, place the roast securely on a heavy cutting board with a juice groove. Position the cut side down for stability. Using a sharp, thin slicing knife, make vertical cuts perpendicular to the central bone down to the skeletal surface. Next, run the blade horizontally along the bone line to release uniform, intact slices. For spiral-cut hams, simply trace around the perimeter of the bone to instantly separate the pre-cut portions onto a warm serving platter.
Safe Storage and Leftover Utilization
Leftover holiday ham is prized for its culinary versatility, but it must be handled in compliance with cold-chain food safety guidelines. Follow these USDA storage rules:
- Rapid Chilling: Transfer leftover ham to shallow airtight containers within two hours of serving to bypass the microbial danger zone of 40°F to 140°F.
- Refrigeration Lifespan: Cooked ham remains fresh and safe in the refrigerator at 40°F (4°C) or colder for 3 to 5 days.
- Freezing Guidelines: For long-term storage, portion ham slices into vacuum-sealed pouches or heavy freezer bags. Frozen at 0°F (-18°C), cooked ham maintains excellent flavor and textural integrity for up to 2 months.
- Repurposing the Bone: The residual ham bone possesses concentrated smoky aromatics and natural gelatin. Simmer the bone with split peas, white beans, onions, and root vegetables to produce comforting, nutrient-dense soups and stews.
Frequently Asked Questions
The USDA recommends baking ham at a steady oven temperature of 325°F (163°C). Cooking at 325°F allows the heat to penetrate through dense muscle fibers evenly while preventing moisture from escaping and ensuring the exterior fat cap renders without drying out.
For fully cooked bone-in hams, reheat at 325°F for 15 to 18 minutes per pound for a whole ham, or 18 to 24 minutes per pound for a half ham. Spiral-cut hams warm faster and only need 10 to 14 minutes per pound until the internal temperature reaches 140°F (60°C).
Fresh uncooked ham must be roasted at 325°F until it reaches a safe internal temperature of 145°F (62.8°C), followed by a mandatory 3-minute rest. A whole fresh bone-in leg takes 22 to 26 minutes per pound, while boneless cuts take 24 to 28 minutes per pound.
Precooked and cured hams should be reheated to a minimum internal temperature of 140°F (60°C). If the precooked ham was not packaged in a USDA-inspected plant (such as leftover ham), heat it to 165°F (74°C). For raw, fresh ham or cook-before-eating cured ham, cook to 145°F (63°C) and let it rest for at least 3 minutes.
Place the ham cut-side down in a heavy roasting pan, pour 1/2 to 1 cup of liquid (chicken broth, apple cider, wine, or water) into the bottom of the pan, and wrap the entire pan tightly with heavy-duty aluminum foil. This traps steam and creates a self-basting humid dome that keeps the meat succulent.
Apply your glaze during the final 20 to 30 minutes of baking. Because glazes contain high levels of sugar (brown sugar, honey, or maple syrup), adding glaze too early will cause it to burn and turn bitter. Uncover the ham, brush on the glaze, and return to the oven at 375°F to 400°F for a caramelized finish.
A bone-in ham generally cooks more evenly because the dense bone conducts heat into the center of the meat, while marrow and collagen melt into natural juices. Precooked boneless hams may warm quickly due to their compact shape, but raw boneless roasts typically require 5 to 10 additional minutes per pound compared to bone-in cuts.
Resting allows the meat fibers to relax and reabsorb hot moisture that has been driven toward the core during baking. Resting for 15 to 20 minutes (with a minimum of 3 minutes for USDA safety) results in significantly juicier slices and prevents savory juices from running off onto the carving board.
Always check the product label on the packaging. Precooked hams will state "Fully Cooked," "Ready to Eat," or "Heat and Serve." Hams requiring cooking will state "Cook Before Eating," "Uncooked," or "Fresh." When in doubt, cook to an internal temperature of 145°F measured with a food thermometer.
According to the USDA, leftover cooked ham can be safely refrigerated at 40°F (4°C) or below for 3 to 5 days. For longer storage, wrap slices tightly in plastic wrap and heavy foil and freeze at 0°F (-18°C) for 1 to 2 months for optimal flavor and quality.